I this Genshin Impact Guide I’m going to be showing you my Ayaka The Snow Bird Build, which utilizes the consistent Cryo application from Ayaka to keep enemies in permanent freeze. Even though she’s a sword wielder, Ayakai imbues all her attacks with Cryo, and plays like a snow princess. Ayaka plays on melee range, but has decent AOE. That makes her a good DPS choice for permanent freeze teams with Hydro and Anemo supports.
In this Genshin Impact Guide I’ll explain just how to build The Snow Bird to face a wide variety of content, and deal potent damage. On top of that, this team is perfectly suitable to finish the Spiral Abyss, up to floor 12-3. If you’ve been looking for a Free to Play Cryo build for endgame and Spiral Abyss, look no further. It’s a direct upgrade from our Frost Shattering Warrior Build, but a much more potent version of it. However, this team is not suitable for exploration, especially in the new Inazuma region because it is Electro focused. If you want to explore Inazuma, use either our Invulnerable Maid Noelle Build, or Yanfei The Smoky Scarlet Witch.
Without further ado, let’s get to the build. I’ll go through what Weapons to use, what Artifacts to upgrade and which companions to pick up, so check this one out!
Genshin Impact Build: Ayaka The Snow Bird
Ayaka is one of the newest five-star character, and first character from Inazuma mainland. She had her own up-rate banner, that ran from July 21, 2024 to August 11, 2024. She was in the game since beta, and has been one of most hyped characters. So most new players will be able to get her, as well as veteran players saving some Primogems, or saving pity to get her. And was the hype justified? Indeed it was, as Ayaka has the best motion value among all sword wielders in-game. If you check our characters tier lists, you will not find a single sword wielder ranked as SSS before Ayaka. but here comes Ayaka, with top-tier DPS, and the least caveats on her kit since the release of Diluc at the game’s launch.
So while Ganyu, and Hu Tao have the potential for higher damage output, Ayaka’s DPS potential is much easier to realize. She’s also more flexible than them, while still being balanced and not breaking the META. To get the best out of Ayaka, you need a freeze team, with one Cryo character for Cryo resonance and a battery. Then you need one Hydro character, for applying freeze, and an Anemo character to swirl Cryo and get the Viridescent Venerer bonus. The good thing is, Ayaka doesn’t need a specific support character in any of these categories. So, you can use any Cryo support, such as Kaeya, Rosaria, Diona, or even Ganyu. Then any Anemo character such as Jean, Venti, Sucrose, or Kazuha. And finally, you can use any of the three Hydro support characters Barbara, Mona, or Xingqiu.

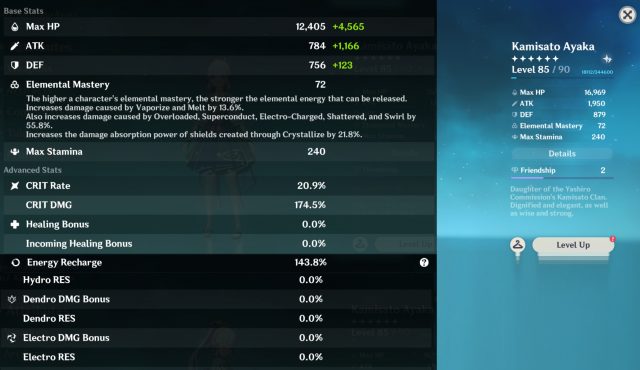
Ayaka The Snow Bird Attributes
We build Ayaka as a pure damage dealer, so we need a Cryo Damage Bonus, % Attack, Critical Rate, and Critical Damage. However, since we are up against enemies that are frozen or affected by Cryo all the time, we get all Crit rates needed from Cryo resonance and the Blizzard Strayer set. So that allows us to use Critical Damage as the main stat on Headpiece in all scenarios, for much more damage. On top of that, if we are using Rosaria in our team, we can easily hit 100% Critical Rate without a single Crit Rate stat in sub stats. That allows us to focus more on % Attack, more Critical Damage, and maybe Energy Recharge as well.
Pick Critical Damage on Headpiece, % Attack on Timepiece, and Cryo Damage Bonus on Goblet. Then put all offensive sub stats you desire on sub stats. Some Energy Recharge (up to 130 ~ 140% total on the character sheet) is preferred unless you have enough Energy Recharge from your weapon to Burst on cooldown.
You will not be seeing the additional 40% Crit Rate from Blizzard Strayer set bonus on the character sheet. Nor will you see a 15% Crit Rate from Cryo Resonance. This stat is conditional, and applies only to those frozen and those affected by Cryo enemies, it’s calculated separately per enemy. So when you calculate Crit Rate, add another 55% on top of what’s on the character sheet. Finally, if you use Rosaria, add 15% of Rosaria’s Crit Rate to Ayaka Crit Rate. (For example: If Rosaria has an 80% Crit Rate, add 12% to Ayaka). So you get approximately 70~85% Crit Rate that’s not shown on the sheet, but you have to take this into consideration.
Ayaka The Snow Bird Weapon
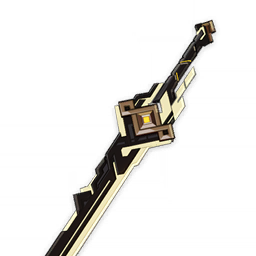
 Ayaka uses a one-handed sword, and in that category, there are a wide variety of very strong weapons for free to play, and gacha alike. We are using the Blizzard Strayer artifact set, and a Critical Damage Bonus on Headpiece, on top of Ayaka’s Crit Damage ascension passive. That puts us in a very good position with Critical stats, and make weapons with Attack Bonus much more desirable. Fillet Blade, Lion’s Roar, and The Flute are all very good options to pick. They have a decent base Attack, and %Attack sub stat, which will give Ayaka an obvious advantage. However, the newly introduced craftable sword is the best among them all.
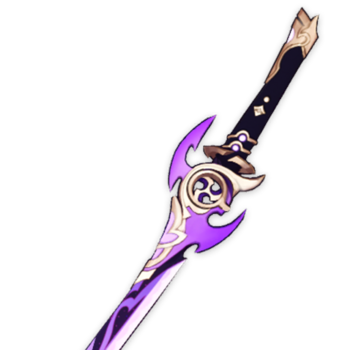
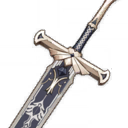
Not only does it have a higher Attack Bonus, but it also has a very good passive that allows Ayaka to generate energy back after using an Elemental Burst. It’s the new standard Sword go to if you are not doing damage through an Elemental reaction, and it also fits Ayaka perfectly. Make sure to finish the quest The Farmer’s Treasure to get the blueprint for this weapon.
Gasha 5 Star Weapons
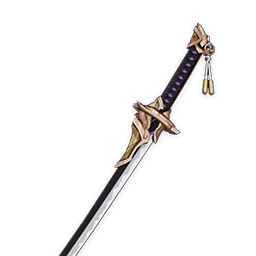
 In case you already have 5 star weapons from previous banners, you can give that weapon to Ayaka and get some DPS increase over four-star weapons. Especially if you have Summit Shaper and play with a shield character such as Diona. This weapon has a high base attack, and a passive that grants even more attack. Being protected by a shield, doubles the attack amount granted from the passive, giving a total potential of 89.6% Attack. Summit Shaper can be a very good pick, if you have it.
The Ultimate Weapon
 Mistsplitter Reforged is the signature weapon for Ayaka, and was released with its own rate up banner this patch. Wishing for both a Five Star Character and a Five Star weapon in the same patch is not a Free to Play friendly option, and we don’t recommend spending money on weapon banners. However, this weapon might come back in the future, along with a character you already have, or a new one you don’t need. So you might prefer wishing for it. But even if you don’t have Mistsplitter Reforged, Ayaka can perform very well.
In terms of calculations, this weapon is just so strong, that it’s best in slot for every elemental DPS sword user. Ayaka can easily utilize the three stacks of weapon passive during her elemental burst, and that’s the biggest increase in her DPS. Though Ayaka can clear the highest Abyss floor with three stars without it, so it’s a luxury in most cases.
Ayaka The Snow Bird Artifacts
Blizzard Strayer
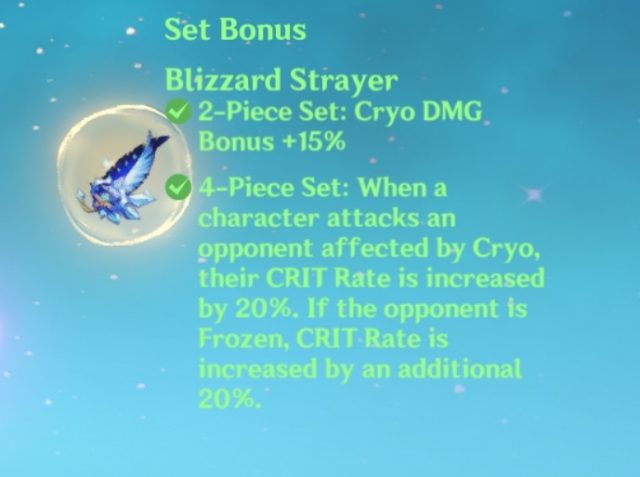
The beauty of permanent freeze builds is the ability to equip the Blizzard Strayer artifact set. It’s one of the most broken sets in the game as it gives a straight up 40% Crit Rate, and Cryo DMG Bonus of +15%. This Crit Rate allows you to switch the main stat of Headpiece to Crit damage, and the sub stat of your weapon to Attack. That’s a huge damage bonus over most other builds. Not to mention the safety of freezing all enemies means Ayaka doesn’t need a shield support, and allows building more DPS oriented supports.
Before Ayaka released, Blizzard Strayer was more suitable for four-star Cryo characters only, such as Rosaria and Kaeya. Chongyun had a hard time taking full advantage of it because his normal attacks shatter frozen enemies. Ganyu Reverse Melt builds preferred Wanderer’s Troupe. So it was a really good, but DPS output was limited by lower modifiers on four-star characters. But now with Ayaka released, she can unleash the full power of Blizzard Strayer to its full potential.
Ayaka The Snow Bird Talent Skills
 Kamisato Art: Kabuki
Sword Normal Attacks are fast-paced, and evenly weighted, so the motion value of Ayaka’s Normal Attacks are always good. This means you can do any number of Normal Attack combos, led into a charged attack. Ayaka combos are more fluid, less restricted, and that’s the beauty of her kit.
If you perform Normal Attacks after using Ayaka’s dash, then every attack is converted to Cryo. It’s buffed by all Cryo damage bonus, and maintainS permanent freeze if you have constant Hydro application from supports. For an elemental reaction like Melt, Ayaka applies Cryo on enemies with only a third of her attacks. That makes her a bad pick for Reverse Melt teams, but doesn’t affect her permanent freeze teams at all.
Charged Attack
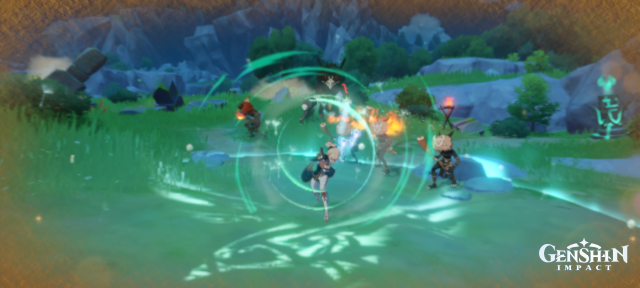
Ayaka’s charged attacks have a good AOE, and hits can reach any enemy in range, even the ones behind Ayaka. It’s a very good tool in Ayaka’s combos which defines her fluid playstyle. It also looks very cool and flashy, and shows the Samurai training Ayaka underwent. You can perform any number of Normal Attacks before a charged attack, and it all connects without wasting any time during the animation.
The charged attacks hit three times simultaneously, and have good damage modifiers on all skill levels. It also consumes less stamina than other sword characters, especially Keqing. Ayaka can also be more relaxed about her charged attack style, and delay her charged attack and not lose DPS. That consumes way less stamina, and pair well with her ability to regain stamina after dashing. However, the charged attack is still not the defining factor of Ayaka’s DPS, because she has yet more tools in her kit.
 Kamisato Art: Hyouka
Ayaka’s Elemental Skill is very simple attack that deals good AOE damage, and applies Cryo. The skill has a 10 second cooldown, and is mainly used for dealing damage, and activating Ayaka Ascension passive “Amatsumi Kunitsumi Sanctification”. This passive buff Normal and Charged attacks by 30% increased DMG for 6s after using Elemental Skill.
This dictates the way Ayaka optimizes her skills in rotation, as you need to dash first, use Elemental Burst, then Elemental Skill, and combo normal and charged attack for the next 6 seconds. Afterward, you are free to switch to support characters, because Ayaka DPS drops77 after this burst window. It also makes Ayaka a perfect fit for speed run teams, because her damage is front-loaded in the first 6 seconds.
Kamisato Art: Senho
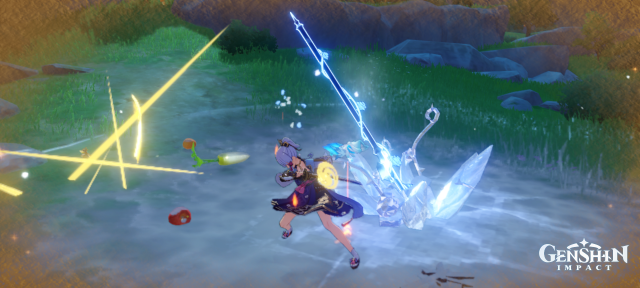
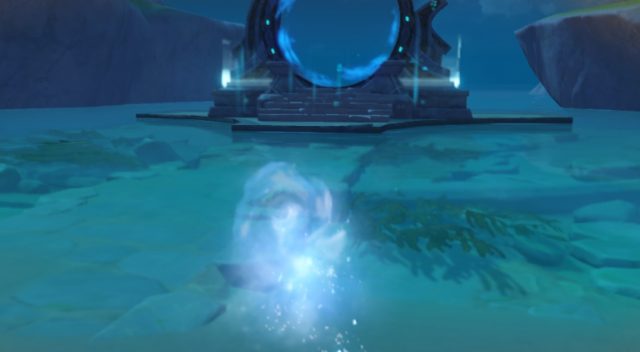
Like Mona, Ayaka has an alternative Sprint/Dash, where she cloaks herself in snow, and floats swiftly over any surface. This allows her to sprint over water, freeze it and emerge standing. It also applies Cryo on enemies Ayaka touch while emerging from this dash. This is used to proc the other ascension passive “Kanten Senmyou Blessing” which restores Stamina, and buff Ayaka with 18% Cryo DMG Bonus for 10s. So always make sure your dash hits an enemy.
The other utility of Ayaka’s dash is imbuing her attacks with Cryo for 5.0 seconds. Which is the main reason why Ayaka excels at permanent freeze, without the need of using Chongyun as support. The alternative Dash is also more responsive than Mona‘s dash, and less awkward. Be sure to refresh it every 5 seconds if you are keeping Ayaka on the field for a long duration.
 Kamisato Art: Soumetsu
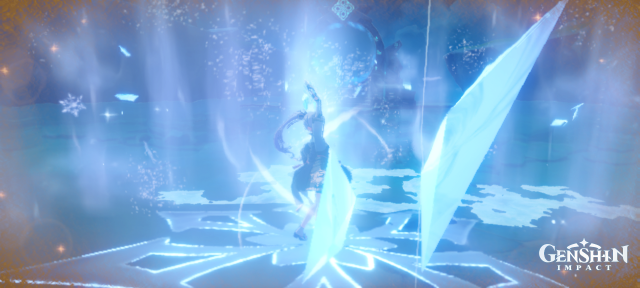
The peak of Ayka’s samurai art is her Elemental Burst, and the highest damage skill in-game (in a single target scenario). This skill costs 80 Energy, and summons a moving blizzard that hits targets 19 times over the duration. The hits cut target 18 times with as 179.68% modifier (at level 8 skill), and blooms once for 269.52%. For an insane total DPS of 3500% over 5 seconds, which is higher than all top burst DPS in-game. To put it in context, note that Xinyan’s Burst goes has a 545% modifier, and Mona‘s Burst ticks once for 708% of total DPS, and can Vaporize for double that. Childe takes it a little bit higher with 742% that can vaporize, and Zhongli goes with a 770% modifier with 2 seconds cast time, and resistance shred. While Ningguang hits 139%*19= 2641%, but a portion of these hit the floor and miss.
The only Burst that competes with Ayaka’s DPS is Ganyu, and only when she’s paired with Venti against several small enemies. That’s because Ganyu‘s burst can shotgun enemies gathered together. Regardless, most of Ayaka’s DPS capabilities come from burst, and she can be played in semi-quick swap teams because of it.
Additionally, Ayaka’s Burst has two gimmicks that define her playstyle. First, is the travelling nature of the Talent, and how it stops against enemies, but doesn’t stop enemies from moving away. That highly encourages freeze comp for Ayaka, to prevent Burst from missing or moving past enemies. In other words, you need enemies frozen to maximize Ayaka Burst damage. Then the quick application of Cryo DPS on Elemental Burst further strips Ayaka of the ability to reverse Melt. If a supporting character applies Pyro, Ayaka Elemental Burst will rapidly consume Pyro aura, and be replaced with Cryo aura.

Ayaka The Snow Bird Party Composition
Genshin Impact has a unique playstyle that relies on switching characters and chaining combos across these characters. So a solid part of Ayaka’s build is knowing which characters will accompany her, and what roles they will play.
In this section, I’ll fill you in on some of the best characters that synergize well with this build. I’ll mostly use four-star characters here, but in the current game version, it’s universally recommended for you to use a five-star support character such as Zhongli, Venti, Kazuha, or even Jean. Each of these offers a slightly different playstyle.
Rosaria

To get Cryo resonance, we need a second Cryo character in the team. I prefer Rosaria over other options, because she can buff Ayaka with the necessary Crit Rate to reach 100%. However, Kaeya still works and gives a higher single target damage. If you already have Ganyu, and don’t need her in a second team, she goes well with Ayaka, and you can build both for DPS. Finally, if you need a healer, and don’t have Jean, then a Cryo healer such as Diona can be a good pick. However, in Permanent Freeze team, healer is not always necessary, and you can get away without one.
So, if you go with Rosaria, she’s one of the easiest characters to build and play. Place her first character slot, use her Elemental Skill and Elemental Burst, and switch into Anemo character to swirl Cryo. Her Elemental Burst leaves a turret on the field, that tick with Cryo damage over a period of time, and is usually the main source of Rosaria’s damage. We can build her as a Cryo battery, or sub DPS, it depends on how much resources you can spare.
You need to make sure Rosaria Elemental Skill takes her all the way through and behind at least one enemy. If done successfully, Rosaria will buff teammates with a portion of her Crit Rate stat.
Stats
DPS Rosaria can go with Cryo Damage Bonus on Goblet, % Attack on Sands, and Crit Rate on Headpiece. Note that Rosaria always prefer Crit rate over Crit damage, because her own Crit rate stat buff Crit rate of the entire party upon landing Elemental Skill.
If you don’t care about Rosaria’s own damage, and you struggle to use her Elemental Burst on cooldown, try using a Timepiece with Energy Recharge instead. Though, Energy Recharge from sub stats will usually be sufficient.
For sub stats, go for more % Attack, Crit Rate, and Crit Damage.
Weapon
 There iss a range of Polearms that work well with Rosaria, from craftable four stars, to Gasha only five stars. Though Rosaria can perform well with even three stars White Tassel, because of its Crit Rate stat that can go up to 23.4%. Favonius Lance is the standard pick for support Rosaria though, to help Ayaka recharge Elemental Burst.
The elemental particles from Favonius Lance is colorless, or in other words, it’s natural particles that recharge all elements equally. That helps not only Ayaka, but the entire team. Rosaria is guaranteed to proc Favonius Lance passive, because of her high Crit rate, and the fact that her Elemental Skill hit twice, doubling the chance.
Artifacts
Rosaria is usually better with the old Noblesse Oblige, or the new Emblem of Severed Fate Artifact set. Because her energy cost is 60, and she’s played along with another Cryo unit (Ayaka), so she doesn’t need that much Energy Recharge. For that reason, I recommend sticking with Noblesse Oblige, and leave Emblem of Severed Fate for one of the none-Cryo units in the party.
Noblesse Oblige buffs the Attack of the whole party, while increasing Rosaria’s own Elemental Burst damage. It’s needed on at least one of your supports, and Rosaria is the best pick. However, if you invest heavily in DPS Rosaria, Blizzard Strayer becomes an option. In that case, you can change Crit Rate stat on Headpiece to Crit Damage.
Anemo support with Viridescent Venerer

The permanent freeze team with Ayaka gains many benefits from an Anemo support. Cryo is easy to swirl in this setup, and the Anemo unit works like a third Cryo DPS. Then Viridescent Venerer buffs swirl damage and shreds enemy Cryo resistance at the same time, which is a very high DPS gain. So Anemo support is core in this party. But what Anemo character to pick though?
The easy answer is: whatever character you have. Ayaka can do a whole load of damage on her own, and picking up the best support character is not a high necessity. She’s also is a five star character from a limited banner, and people who saved for her, might not have several other five star characters. All of Jean, Venti, Sucrose, Kazuha, or the Anemo Main Character are all perfectly suitable for the role. The order of their strength follows the same order posted in our Anemo Swirl tier list. The effect of the Anemo character you pick though does extend to other team members picked for other slots, and I’ll explain how:
How Anemo character in team affect other team picks
It’s as simple as recognizing the extra role or utility your Anemo character brings to the team. For example Jean is a healer, so if you pick her, you don’t need another healer in the Hydro or Cryo slot. But when you use Sucrose who can’t control enemies all the time, you are going to need Barbara or Diona.
If you bring Venti or Kazuha who suck enemies in with their Elemental Burst, you can easily pick Mona for the Hydro slot. Even if Mona has a lower uptime for her Hydro buff, Venti’s swirl will keep them frozen anyway. While picking a character with weaker gathering capabilities might require Xingqiu to keep enemies frozen. Especially when they are scattered around.
Against a single target situation though, most of this is irrelevant, and all characters will perform similarly. However, you are tied to what characters you have, and if you are a new player, you are limited in your options. So don’t stress yourself on this too much.
My personal pick for this team though is Jean, and I play her in a very straightforward way. Her Elemental Skill can gather smaller enemies from a short range, and her Elemental Burst heals over time. So I put her on a quick swap rotation, and don’t bother with her on-field time.
Stats
You can go with Anemo Damage Bonus on Goblet, Crit Rate or Crit Damage on Headpiece, and finally Energy Recharge on Sands. That goes with most characters unless you pick Sucrose or Kazuha, who might prefer Elemental Mastery on the Sands. Also, in some situations with Venti or Jean, you end up with so much energy generation, so you can get away with an Attack bonus on the sands instead. Jean also scale her healing with an Attack stat.
For sub stats, you always need offensive stats, and Energy Recharge. Anemo characters are flexible, and can build for DPS, EM, or ER.
Weapon
 Most Anemo characters work well with ER weapons, like Favonius or Sacrificial series. Favonius is preferred for the generic elemental particles it generates, though it requires more investment in the Crit Rate stat to be effective. Though if you pick Kazuha, you need an EM weapon instead, and for Venti you need a high DPS weapon to realize his full power.
Artifacts
You need Viridescent Venerer for any Anemo character you use, and nothing else competes with it. It buffs both the character and team, and it works with any elemental damage team.
Mona

Mona has been one strongest five-star characters in Genshin Impact since launch. She fell out of favor over time with the release of better hyper carries and support characters. The gimmick Mona brings to the team is this: She paralyzes enemies and suspends them in the air, while increasing damage dealt against them for a short duration. That usually wasn’t very beneficial for sustain DPS characters, because she doesn’t apply enough Hydro for steady elemental reactions. That’s why Xingqiu becomes more popular, especially with how much easier it was to obtain him and unlock his constellations.
However, in version 2.0 Mona got an indirect buff, which brought her back into the Meta. With the introduction of the Emblem of Severed Fate Artifact Set, Mona got the very first five star set with an Energy Recharge (ER) bonus. Emblem of Severed Fate not only increases Energy Recharge, but it also gives a huge damage multiplier to Elemental Burst, based on the total ER of character. That enables Mona to build full ER and gain even more DPS.
Mona Elemental Burst increases all damage enemies take for a short duration, so it is preffered to pair her with Venti or Kazuha against smaller enemies. The Anemo character gathers enemies, so Mona hits them all with Burst. If enemies are frozen, Mona’s debuff duration extends to a longer duration. On the current Abyss in 2.0, Mona (or Barbara) is a good pick for Floor 11-3 second half, against Pyro Hypostasis boss. She can bring down its shields with her normal attacks, to save much-needed time.
Stats
For Mona you need to maximize Energy Recharge first and foremost, up to 250% ER or a little more. ER not only makes Mona spam Elemental Burst on cooldown, but also gives her a Hydro Damage Bonus. On top of that, it gives a damage multiplier to Elemental Burst if you use Emblem of Severed Fate.
Get Sands with Energy Recharge, Goblet with Hydro Damage Bonus or Attack, and Headpiece with Crit or Energy Recharge, depending on how much ER you have without Headpiece. The most important part of Mona’s Kit is getting enemies debuffed before Ayaka’s Burst.
Weapon
 When it comes to weapons, Mona perfectly synergies with Favonius Codex, as it has the highest ER stat in the Catalyst category. It also helps the party to regenerate energy when Mona scores a Critical hit. It’s one of the more common four-star weapons, and it scales better with a higher refinement level.
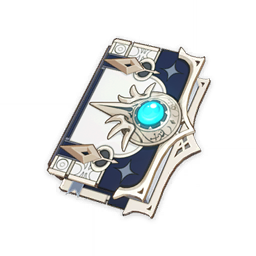
 However, Favonius Codex is not the only option. Any Catalyst support has an amazing support weapon that’s Thrilling Tales of Dragon Slayers or (TToDS). This weapon simply buffs one character with an outstanding 48% Attack bonus for 10 seconds, on 20 seconds cooldown. You have control over which character gets the Attack Bonus, by switching from Mona into the desired character. In all Scenarios you need this buff on Ayaka, so you put Mona in the third spot and Ayaka fourth in your rotation.
Artifacts
I can’t stress enough how Emblem of Severed Fate is a great Set for Mona in all aspects. It gives an ER bonus, and scales Mona’s damage even further with an ER stat. You have to spend your resin farming this set if you plan on using Mona as a DPS or support. It also works on several other support characters, on many team compositions.
We hope you found this build useful, and hopefully it gives you a good idea of how to maximize Ayaka’s potential.
Genshin Impact 2.0 update is now available to play on PC, iOS, Android and PS4 and PS5. If you enjoyed this Genshin Impact Guide be sure to check out more even more info on our Genshin Impact Wiki. You can also keep an eye out for more guides for upcoming 2.0 and be sure to not miss our Noelle, The Invulnerable Maid build. As well as, our Genshin Impact Character Tier List: Reverse Melt (Cryo).
Fextralife
Source link
Related Post:
- Genshin Impact Build: Noelle, The Invulnerable Maid – Inazuma & Abyss Ready Guide
- Hu Tao Build Guide | Genshin Impact | Abyss Ready
- The best Genshin Impact Ayaka build
- Genshin Impact 2.0 Revealed! Screenshots of Inazuma Location and New Characters: Ayaka, Yoimiyo, Sayu
- Genshin Impact Ayaka banner and abilities
- Genshin Impact Teaser Details Ayaka’s Backstory
- Ayaka Feels Helpful Even at Lower Levels in Genshin Impact
- Genshin Impact Gets a New Trailer All About New Character Kamisato Ayaka
- Genshin Impact Gets New Character Trailer for Kamisato Ayaka
- Genshin Impact Gets New Trailer Showing Kamisato Ayaka’s Gameplay In Action