Alongside the release of Senntisten, Jagex added four new spells to the Ancient Spell Book. Since their introduction, the community has been trying to figure out what role each of the spells should play. Whilst the more popular Smoke Cloud and Incite Fear have become popular for PvM in RuneScape, many have overlooked the Animate Dead spell.
Those interested in trying out the below methods will need to first unlock Animate Dead. The requirements for this are the completion of the ‘City of Senntisten‘ and ‘Desert Treasure‘ quests. These both have various other quest requirements, as well skill necessary skill levels which can be viewed on the official wiki.
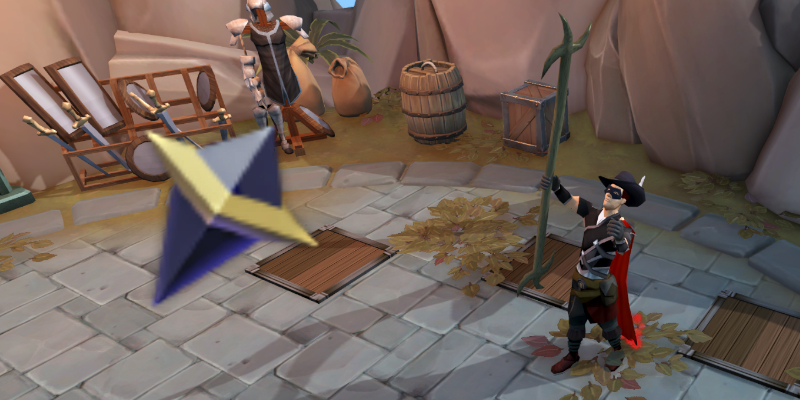
What does Animate Dead do?
As far as spells go in RuneScape, Animate Dead is one of the more unusual. It is a utility spell that focuses purely on buffing up your defense rather than dealing damage. The runes needed to cast it are 6 Soul Runes, 15 Blood Runes, 15 Death Runes, and 30 Earth Runes.
At current Grand Exchange prices, that prices each cast of Animate Dead at 27,500 coins. It lasts 12 minutes, meaning that its upkeep cost is around 140k coins per hour. Main accounts should have no issues affording this, but ironmen will have to figure out a reliable way to gather both Soul Runes and Blood Runes.
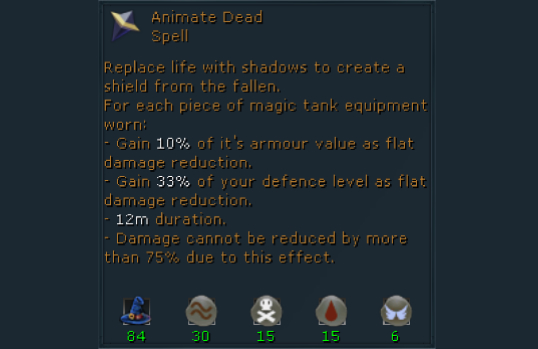
The amount of magic tank armor pieces worn will impact the potency of this spell. Each piece of magic tank armor applies another stack of the listed buffs. Tank armor differs from the more commonly used power armor as it does not provide a style bonus, but it does have a higher armor rating.
Getting into the exact math to figure out exactly how much damage Animate Dead negates can get awfully complicated. However, breaking down what these effects mean in practice is simple enough. Since Animate Dead reduces damage by a fixed amount rather than a percentage, it is great against continuous but low damage attacks. This makes it more situational against bosses but exceptional for high-level Slayer training.
Equipment and inventory
The below equipment setup is a guideline for what is optimal. Not all listed items are necessary for this method, with many offering useful quality of life bonuses but little else. Examples of this are the Slayer Master Cape used to get desirable Slayer tasks more often, the Excaliber and Ancient Ritual Shard for regaining HP/Prayer, and the upgraded Dwarven Siege Engine cannon for additional passive damage.
Listed items that are necessary and worth investing in are the Noxious Staff, Ganodermic armor pieces, the Ancient Cloak, Rune Pouches, the Amulet of Souls, a cannon or Oldak Coil, and all of the listed potions. Those looking to cut down costs may find it useful to switch out six-dose flasks for four-dose potions and sailfish for cooked sharks.
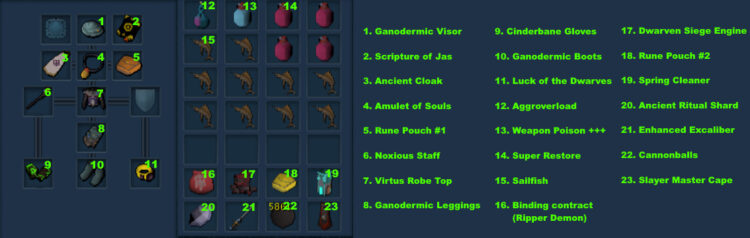
Any weapons or armor better than the listed examples should work too. For example, using higher-tier magic tank armor like Achto or Superior Seasinger’s instead of Ganodermic is fine. Max-level players should be able to get away with one piece of augmented magic power armor in the torso slot. However, if the enemies of RuneScape are dealing too much damage, feel free to use another piece of magic tank armor to get the most out of Animate Dead. Make sure that either your robe top or bottoms have the Enhanced Devoted Invention perk as this is required to survive some of the harder-hitting Slayer tasks.
For more difficult tasks the Blood Barrage spell will be necessary to out heal incoming damage. Having a second Rune Pouch containing Blood and Fire runes to cast Blood Barrage is useful for saving inventory space. These Blood runes will be used for both Blood Barrage and Animate Dead so be sure to stock up in advance.
Task guide
For the majority of Slayer tasks, the recommended setup should work. Some tasks like Nightmare Creatures may require Magic Notepaper to loot certain items. This is because it’s not possible to use High Alchemise to convert their Dragon weapon drops into coins whilst using the Ancient spellbook. Also, it is not practical to use a cannon, Oldak Coil, or Dwarven Siege Engine for every task. If a cannon is not present in the example image for each task below, assume that it cannot be used.
Legacy combat should always be toggled on for this method as Animate Dead is much more effective in this mode. This will result in more runes being used per hour but the upkeep costs are still cheaper than the alternative Scrimshaw of Vampyrism. Furthermore, a lot less damage is taken when using Animate Dead making most Slayer tasks either low intensity or completely AFK. Any high-level Slayer tasks not mentioned below were either too much effort to justify the returns or ineffective with this setup.
Camel Warriors
Head over to the Camel Warrior area to the east of Sophanem. Set up your spells, prayer, and overload and attack just one Camel Warrior. Even with Animate Dead, trying to take multiple of these on at a time will result in a trip to the RuneScape Grim Reaper. Occasionally, a Camel Warrior may live long enough to use its special attack. If so, step to the side when it is used to avoid dying.
Prayer: Deflect Magic, Overload: Holy Overload
Don’t use aggro tools like Aggression Potions or cannons at this spot. Having several Camel Warriors aggro you at once will most likely get you killed. Although not fully AFK, this is a relatively relaxed method to what is otherwise one of RuneScape‘s more intensive Slayer tasks.
Corrupted Creatures
These can be found in the Sophanem Slayer Dungeon. An easy way to reach this is by using a Sophanem Slayer Dungeon teleport which can be purchased from the Grand Exchange. Be sure to buy Feather of Ma’ats from the NPC next to the entrance as these are required to finish off enemies inside of the dungeon. One feather is consumed for each successful kill.
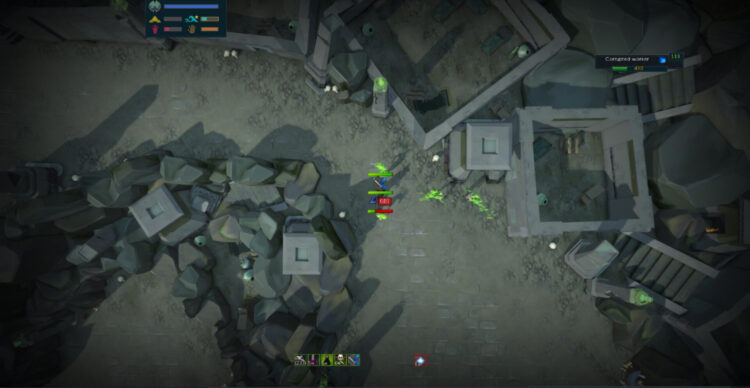
Prayer: Deflect Melee, Overload: Aggroverload
This method works on all Corrupted Creatures but it is advised to kill Corrupted Workers for the best experience rates. These can be found near the Soul Devourers further on into the dungeon. Once set up, this task is fully AFK and will only require the occasional prayer restoration and overload reset. The spot seen above is the best area to stand if killing Workers.
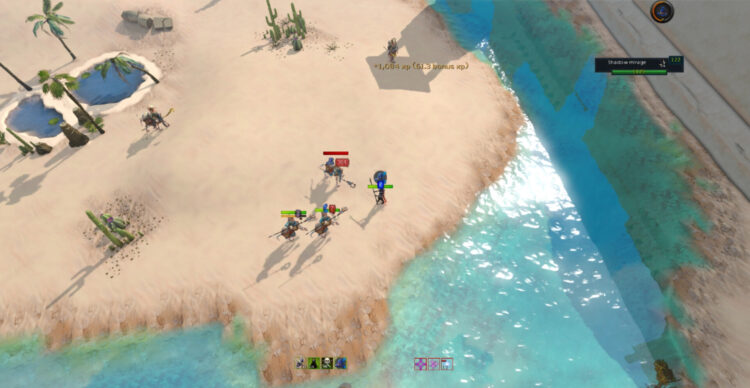
Creatures of the Lost Grove
When done right, Moss Golems found in the Lost Grove are arguably the best Slayer task in RuneScape. The setup requires a little bit of work but the task is mostly AFK once you get going. Place either a Dwarven Siege Engine or Dwarf Multicannon in the location seen below. Activate it and then run to the same spot where I’m standing up the nearby hill, as seen in the picture.
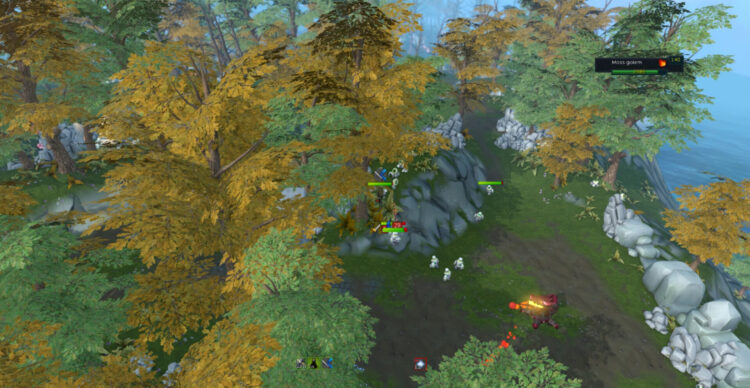
Prayer: Deflect Melee + Torment, Overload: Elder Overload
Assuming you have a tier 90 staff or better and are using the correct prayers and overload, this is entirely AFK. The cannon will tag enemies aggroing them to you whilst Blood Barrage should deal enough area of effect damage to out heal the incoming damage. Make sure to not let either your Prayer points or Animate Dead expire as you won’t last long without them.
Dinosaurs
After casting Animate Dead place down an Oldak Coil. Either an Aggroverload or Aggression Potion is required here to keep at least three Venemous Dinosaurs aggroed at once. The Coil alone will not be enough. A Dwarven Siege Engine can work here too but will result in fewer kills per hour.
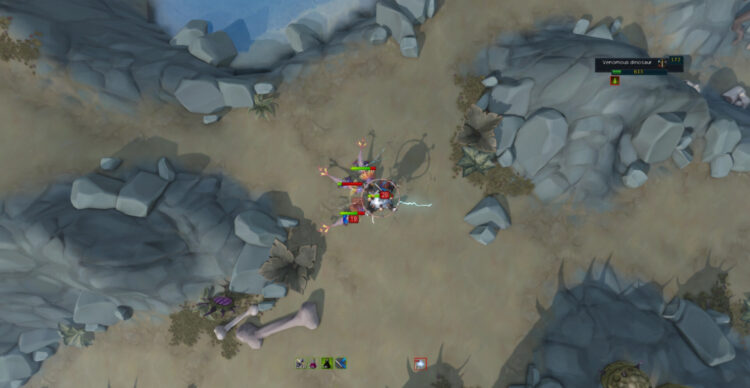
Prayer: Deflect Melee, Overload: Aggroverload
Once again, this is a fully AFK task that requires very little input once you start. If you haven’t yet upgraded your Anachronia Slayer Lodge to level 3, be sure to keep one inventory slot open at all times. All dinosaurs drop an item necessary for that upgrade which can be missed if your inventory is full.
Elves
Teleport to Prifddinas and run north to Morvran. Alternatively, he can be directly teleported to by using a Slayer Cape. Drink a dose of an Aggroverload and run around tagging the Elven warriors in the area. Be sure to keep them aggroed at all times. Lead the elves back to the location shown below.
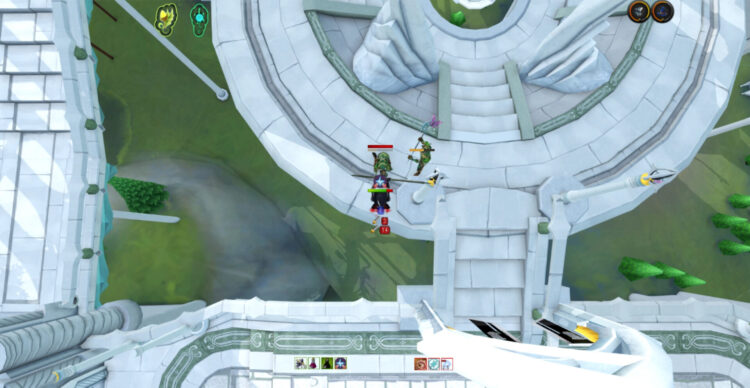
Prayer: Soul Split, Overload: Aggroverload
Although it takes time to get in position, no other input is needed once set up. Deflect prayers cannot be used here as the Elves disable them, so it’s best to use Soul Split alongside Blood Barrage to maximize healing potential.
Nightmare Creatures
Even with the Animate Dead spell, Nightmare Creatures are amongst the most damaging enemies in RuneScape. To avoid taking too much damage, it is best to only use an Oldak Coil to aggro whilst avoiding Aggression Potions and Aggroverloads. Technically, more kills per hour can be achieved with an Aggroverload, but that method requires significant focus to stay alive.

Prayer: Deflect Range + Torment, Overload: Holy Overload
Although these primarily use melee attacks, it is still better to pray Deflect Range. This is because their special attack deals ranged damage and hit up to 5000 damage if not dealt with. As long as you pay attention and make sure your buffs and spells don’t expire, this task is good money and relatively laid back.
Soul Devourers
Much like Corrupted Creatures, these can also be found in the Sophanem Slayer Dungeon. Once again, Feather of Ma’ats must be purchased from the NPC next to the entrance in order to deal damage. Players looking to fully AFK this task will want to kill either Salawa Akh or Feline Akh.
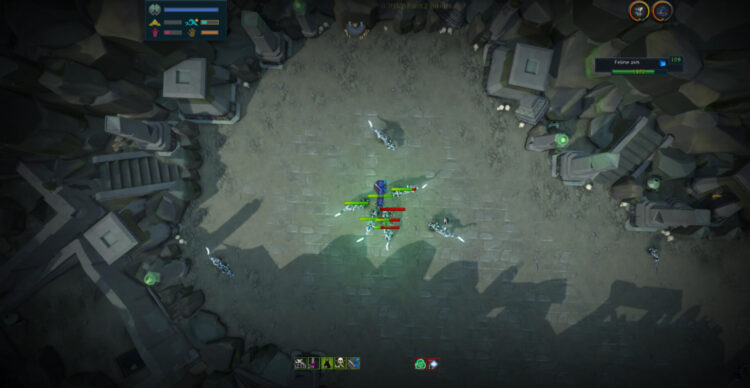
Prayer: Deflect Melee, Overload: Aggroverload
However, if optimal experience rates are the goal then consider killing Crocodile Akhs instead. These hit harder and may occasionally require some manual input but provide fantastic Slayer experience. Be aware that running out of Prayer points against these is deadly so be sure to pay attention.
PC Invasion – FeedDDD
Source link
Related Post:
- The Jackbox Party Pack 8 reveals Drawful: Animate as its third game
- Bringing a sword to a spell fight in New World
- This Wholesome Skyrim Mod Offers A Spell That Lets You Get Your Hug On
- Spell-Casting Xbox, PC Shooter Into The Pit Wows At GamesCom
- No more overpowered dancing in Destiny 2 PVP
- Apex Legends’ overpowered tap-strafing will be removed in an upcoming patch
- 4X game Humankind has some amazingly overpowered world wonders right now
- Left 4 Dead Characters Join Zombie Army 4: Dead War in Free New Season Pass 3 Content Drop
- Valve doesn’t need Left 4 Dead 3, it just needs to update Left 4 Dead 2
- Dead Space was never dead and Battlefield Portal looks great- VG247’s Definitely Not a Podcast Video Chat #5